Difference between revisions of "An Advanced Terrain and Megatexture"
From Mod Wiki
| Line 31: | Line 31: | ||
= Mudbox: Shape the Terrain = | = Mudbox: Shape the Terrain = | ||
| + | These are the basic steps for sculpting a terrain in Mudbox. | ||
| + | |||
| + | * Create a plane, and subdivide (but still keep a low tessellation). | ||
| + | * Change any tools you use to have the edit ''Direction'' set to ''Y axis''. | ||
| + | * Sculpt the rough layout for the terrain. | ||
| + | * Subdivide again to as detailed as you want (or can). | ||
| + | * Sculpt more details into the terrain. | ||
| + | * Export to OBJ. | ||
| + | |||
| + | |||
| + | = Convert Mesh to Heightmap = | ||
| + | This step is needed if you want to import your current terrain mesh into World Machine. | ||
| + | |||
| + | * Firstly, rotate the terrain mesh. In Lightwave, rotate -90° around the X axis. For 3ds Max & Maya, rotate +90° around the X axis. | ||
| + | * Cap any holes in the mesh, and triangulate. Using a machine with an nVidia graphics card, run the following command in the ETQW console to get the heightmap (where [model] is pointing to the relative path of the ''.lwo'', ''.obj'' or ''.ase'' mesh): | ||
| + | ''RenderBumpFlat –floatHeightmap -size 2048 2048 [model]'' | ||
| + | * An .r32 (raw 32-bit) heightmap will be saved into the same folder as your model, and this heightmap can be used in World Machine. | ||
Revision as of 15:32, 4 December 2007
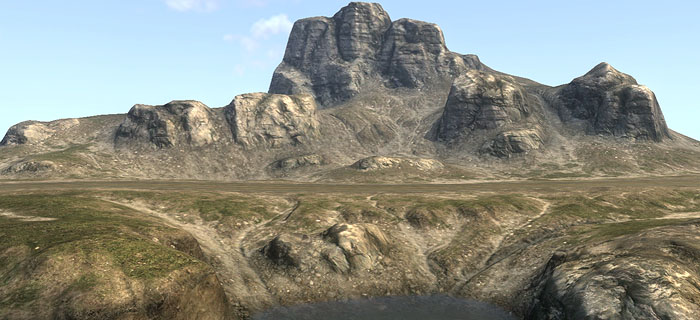
This guide will show you step by step, on how to create a detailed Megatextured Terrain.
Contents
Introduction
For this tutorial you must:
- Have a modelling package that can export as LWO 0r OBJ
- Have basic modelling skills
- Have basic mapping skills, as in A Simple First Map
This tutorial covers:
- Steps to create a detailed terrain mesh.
- How to assign the Megatexture
- How to add the terrain mesh to a map
- How to make a Megatexture
- How to compile a Megatexture
- How to add Water to a map
Programs used in this tutorial are:
- Mudbox
- World Machine
- Lightwave
- Maya (only used briefly)
Other similar programs can be used instead of these, but wont be covered in this tutorial.
This tutorial does not cover in detail:
- How to use Mudbox / ZBrush / World Machine / Blender / Lightwave / Maya / 3DSMax
If you already have a terrain mesh, and do not want to use Mudbox and World Machine, skip to Prepare Terrain for Megatexture .
Mudbox: Shape the Terrain
These are the basic steps for sculpting a terrain in Mudbox.
- Create a plane, and subdivide (but still keep a low tessellation).
- Change any tools you use to have the edit Direction set to Y axis.
- Sculpt the rough layout for the terrain.
- Subdivide again to as detailed as you want (or can).
- Sculpt more details into the terrain.
- Export to OBJ.
Convert Mesh to Heightmap
This step is needed if you want to import your current terrain mesh into World Machine.
- Firstly, rotate the terrain mesh. In Lightwave, rotate -90° around the X axis. For 3ds Max & Maya, rotate +90° around the X axis.
- Cap any holes in the mesh, and triangulate. Using a machine with an nVidia graphics card, run the following command in the ETQW console to get the heightmap (where [model] is pointing to the relative path of the .lwo, .obj or .ase mesh):
RenderBumpFlat –floatHeightmap -size 2048 2048 [model]
- An .r32 (raw 32-bit) heightmap will be saved into the same folder as your model, and this heightmap can be used in World Machine.
