Terrain
Contents
Introduction
This is not a tutorial on how to model terrain; rather it is a set of guidelines to help you understand our workflow when creating terrain.
ETQW uses model based terrain. While you are free to use any 3D modeling package to create the terrain, the final product needs to be a triangulated LightWave object (.lwo) for use in the game. The level design team at Splash Damage used Maya to model the initial terrain meshes before they were handed to the art team for World Machine procedural detail and megaTexture work. See Making a Terrain Model for the megaTexure process.
The OBJ format was used to transfer the terrain mesh between Maya and LightWave. The initial terrain was kept as quads in Maya during the blockout phase with only the necessary quads turned into triangles where obvious edge flipping was required. The workflow in Maya became sculpt, save, triangulate, export to OBJ, undo triangulation. This meant you could always work on a "clean" quads version of the model during development in Maya but export a triangulated version to LightWave for testing in game. Maintaining quads is not necessary; it’s just what worked for us.
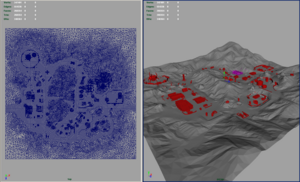
EditWorld can also export an OBJ of any selected brushwork, references, or models (Ctrl + E). These OBJ models can be imported into Maya as a guide, useful for aligning terrain vertices to buildings and cover geometry. The origin of the EditWorld exported OBJ resides at 0 0 0 of the EditWorld grid (exporting from EditWorld combines all selected objects into one OBJ model with a new origin). Placing the OBJ at 0 0 0 in Maya means you can see the position of the objects in Maya as they sit in EditWorld.
Some benefits of using Maya for terrain
- Sculpt Geometry Tool
- Good 3D camera
- Excellent scene management (layers, groups, the Outliner)
- Easily customizable interface
Design Thoughts
Try to keep the main play area (GDF and Strogg Bases, objectives, major buildings, underground bunkers, etc) at least two thousand units from the edge of the main terrain mesh. This general rule when added to the 4096 unit wide Out Of Bounds "ring" creates a nice buffer that stops players from flying air vehicles or driving ground vehicles into the hard caulk box edge of the map. The player should die before crashing into the caulk box. Don’t place things at the edges of the map that will entice the player to venture away from the main play area.
During the planning phase of your level, identify routes for foot soldiers and routes ground vehicles. Roads and routes for vehicles should be smooth unless you purposely want to make an "off-road" area where the player would not expect to be able to travel quickly. This rougher route might be good for the slow moving Dessecrator and Titan but not so good for the faster moving Husky and Armadillo. The level designers at Splash Damage used Maya’s Sculpt Geometry Tool’s "smooth" feature to ensure that major vehicle paths were as nice as possible to drive on. If it’s a tarmac road, the player should expect a smooth ride.
The Grid
EditWorld uses a grid so it makes sense to pay attention to the grid in Maya, especially around buildings where you want to snap your ground to the same vertical level as the brushwork (usually on the comfortable 8 unit grid). See Maya - Level Designer setup for information on how to set up Maya’s grid to be similar to EditWorld’s grid, along with other interface customizations that make working in Maya more like working in EditWorld.
The Deployables (turrets, artillery, and radar) also use a grid system for where they can and cannot be deployed. Designing terrain to coordinate with your buildings, cover geometry, and deployment squares is easy when you can see the grid in the terrain model itself. A valid deployment spot requires 512 by 512 units, 4 squares of terrain if you follow the guidelines outlined below.
The initial polyPlane in Maya
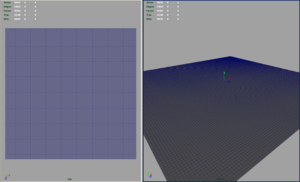
The terrain model starts out as a simple polygon plane and is subdivided to create a grid of 256 by 256 unit quads.
- Width: 32768
- Height: 32768
- Subdivisions Width: 128
- Subdivisions Height: 128
- Tris: 32768 (a good number that will somewhat represent your final mesh)
Terrain sculpting
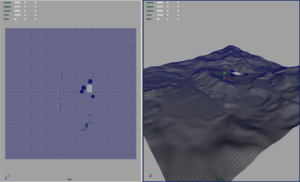
The Splash Damage level designers used Maya’s Sculpt Geometry Tool and a pressure sensitive Wacom Tablet to speed up the process of terrain creation. This allowed us to interactively "paint" the geometry displacement very quickly. The Sculpt Geometry tool is very powerful and quite easy to use. More information can be found in the Maya help files under Ploygonal Modeling – The Sculpt Geometry Tool.
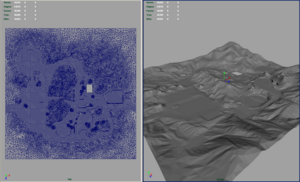
Creating a terrain is an iterative process. The initial design needs to be gameplay tested and refined before proper detailing should begin. Start by only moving vertices up and down for the initial sculpting phase. This "heightmap" approach keeps the original grid intact and means it is easy to make quick changes without wasting time modeling detail that may later be changed for gameplay reasons. Save the fine details for a time when you are happy with how your map plays and are confident that no major changes need to be done.
Out Of Bounds (OOB)
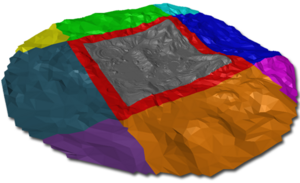
ETQW uses a non-playable area to extend the view of the main terrain. We call this the "Out Of Bounds" or "OOB" for short. The basic premise of the OOB is to extend the scene to the horizon, mirroring the megaTexture to avoid ugly texture tiling.
Since we know that the megaTexture is going to be mirrored, we should try to design the map in a way that creates nice megaTexture mirroring. This is done by trying to keep more generic detail at the map’s border edges. As mentioned above, keeping buildings and bases at least two thousand units from the edge of the map also helps contribute to having more generic detail at the edges.
Try to plan major roads and highways so the mirroring created when they leave the main playable area still looks natural. A good tip here is to make the road "exit" the map perpendicular to the map’s border edge, trying to let it straighten out for those last two thousand units. This creates a long straight bit of road that is easy to manage into the OOB.
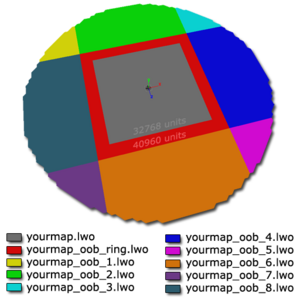
The "oob_ring" model extends the playable area (as mentioned above) beyond the main mesh’s 32,768 by 32,768 units. Players and vehicles can travel on the "oob_ring", so the level of detail in this portion of the terrain should match that of the main mesh.
The OOB sections beyond the "ring" should contain less detail and should probably be more optimized during the detail phase of construction. Some degree of forced perspective can be applied to terrain features at the edges of the OOB to create the illusion of greater distance. Often simple triangles when viewed through nice atmospherics can look like mountains off in the distance and make the level feel much larger than it actually is. If a player cannot get too close to geometry, you can also cheat the scale of out-lining buildings or towers by making them smaller than they would normally be, again creating a feeling of them being viewed from a much greater distance.
UVs
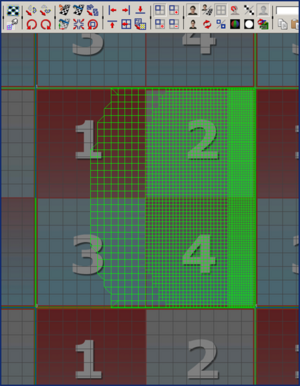
The main terrain mesh must have UVs that reside in the UV range of 0 to 1. There should not be any UVs sticking out of this range. Typically the UVs for the main terrain mesh start as a fitted planar map but the UVs can be relaxed. It is recommended that the border edge UVs do not get relaxed so that they remain nicely at the edges of the 0 to 1 UV range.
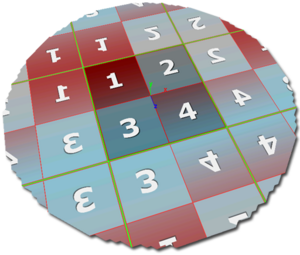
The OOB mesh has mirrored UVs at the boarder edge (see image). This allows the megaTexture to mirror across each border with no obvious tiling.
Prefabs
The SDK installs some prefab flat terrain model OBJs which can be imported into Maya for sculpting.
- Main mesh: terrain_prefab.obj
- OOB: oob_prefab.obj
- Note: The mirrored UVs are already set up for the "oob_prefab"
You can import these two OBJ models straight into Maya and begin sculpting. For proper set up in a map, the "oob_prefab.obj" needs to be chopped up into 9 different models based on the image seen to the right. An example of this setup can also be seen in "etqwmap.world" that installs as part of the SDK.
