Bump Maps
Virtually all geometric surface detail should be represented in bump maps instead of drawn into the diffuse maps in the conventional style. This allows a single texture to take on different characteristics based on its interaction with lights.
Ideally, local (or tangent-space) normal maps should be generated from high-poly geometry for the best consistency and surface detail. However, it is often necessary to create normal maps from source photography and textures. This can be done in Photoshop by using the NVidia Tools NormalMap Filter, or using a 3rd-party application such as Crazybump.
Two types of images can be used for bump mapping in ETQW; height maps and normal maps.
Height Maps
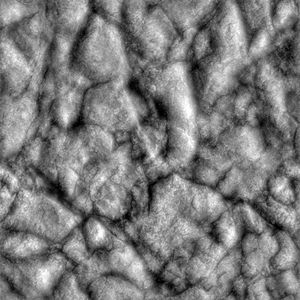
A height map is a gray scale image, with black being the farthest distance away and white being the closest. An addition scale parameter is required when using height maps to determine how deep the image is supposed to be. You can’t properly cut and paste image fragments between height maps with different scale values without distorting the shading. You can add, subtract, airbrush, or smooth gray values by hand on a height map with predictable results.
Local Normal Maps
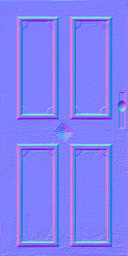
A local normal map encodes the actual perturbation angle of the surface at each point in the RGB color, so it is complete by itself without any scaling parameters. You can cut and paste between any normal maps without problems, but you can’t reasonably modify the angles of normal map surfaces by hand, or create one from scratch. Smoothing a normal map works reasonably well in practice, although it does result in denormalized pixel values.
The normal vector is encoded as ( ( R-128 ) / 128, ( G-128 ) / 128, ( B-128 ) / 128 ), so a normal pointing straight up ( 0, 0, 1 ) would be encoded as ( 128, 128, 255 ) in the image. Most local normal maps will be primarily bluish, because most of the vectors will be pointing up more strongly than any other direction.
Renderbump is also capable of generating "global normal maps", which encode an absolute direction in object space, instead of in local surface space, but global maps cannot be deformed or used on different wall orientations in the same object. They have some minor quality and performance benefits.
Height maps must be converted to normal maps at load time, so it is usually superior to use normal maps unless you need to manually create or manipulate the image in a way that is easier with height maps.
You can’t make a perfectly smooth slope in a height map because of the limited precision in the gray scale image. This results in shaded streaks along the slope, especially with higher resolution height maps. You may be able to hide that by adding some waviness to the surface manually.
Using Bump Maps
Every surface that interacts with light will have a normal map.If one isn’t specified, it will default to "_flat", an internally generated normal map with no changes. There is currently no speed benefit to not having a normal map, although it might be possible to add a fast path for that in the future.
Most materials can be specified in the "shortcut" form, where you specify the diffusemap, specularmap, and bumpmap, and let the engine generate the full stages for it.
   material textures/cc/techpanel
   {
       diffusemap       textures/cc/techpanel_d.tga
       specularmap      textures/cc/techpanel_s.tga
       bumpmap          textures/cc/techpanel_local.tga
   }
If diffusemap is not specified, it defaults to a solid white image. If specularmap is not specified, specular lighting will be disabled for that surface, giving a speedup.
You can modify the lighting calculations to examine the bump mapping under different conditions:
r_skipSpecular <0/1>
r_skipDiffuse <0/1/2>
Renderbump
The RenderBump tools generate normal maps directly from detailed polygonal geometry.
For a full explanation, see Renderbump.
Editing Normal Maps
Using the AddNormals tool, two different normal maps can be combined.
Usage: addnormals <normalmap 1> <normalmap 2> [mask] <out filename>
  Example: addnormals bumpy_local.tga rusty_local.tga bumpyrusty_local.tga
  Example: addnormals bumpy_local.tga rusty_local.tga my_mask.tga bumpyrusty_local.tga
This tool ensures that no normal data is lost or incorrect normals get created. The end result is a new normalized normal map.
When using a mask image to combine two normal maps, this image has to be either grayscale or have its mask data stored in the red color channel.


