Difference between revisions of "A Simple Second Map"
(→Adding an Ambience) |
|||
| Line 141: | Line 141: | ||
== Adding an Ambience == | == Adding an Ambience == | ||
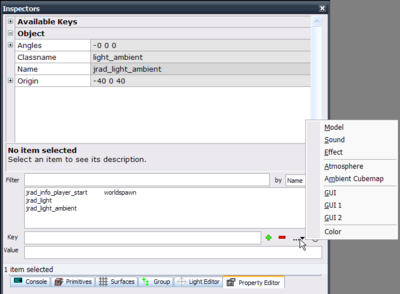
| + | [[Image:simplemap_properties.png|thumb|400px|Property Inspector shortcuts]] | ||
Empty maps are, by default, pitch-black. However, this produces interiors that are not convincing. To counter this, maps should have either atmosphere entities (if they're outside) or light_ambient entities (if they're inside), which help light up an area with a constant colour. | Empty maps are, by default, pitch-black. However, this produces interiors that are not convincing. To counter this, maps should have either atmosphere entities (if they're outside) or light_ambient entities (if they're inside), which help light up an area with a constant colour. | ||
| − | To add an ambience to this map, simply create a [[Entity light_ambient|light_ambient]] entity and place it anywhere inside the map. | + | To add an ambience to this map, simply create a [[Entity light_ambient|light_ambient]] entity and place it anywhere inside the map. On the Property Inspector ({{accelkey|N}}) press the shortcut button (next to the red '-' button, pictured) in the Property Inspector, select 'Ambient Cubemap', followed by an ambience you wish to use. If you use the real-time renderer ({{accelkey|F3}}) the 3D view will also show you the ambience you have chosen. |
| + | |||
| + | ''You can also preview ambience and atmosphere effects from the toolbar - use the dropdown menu from the blue and white 'clouds' icon. Note this will only affect the editor's real-time preview - once you've found an ambience or atmosphere you like, use the same setting in your light_ambient or atmosphere entity.'' | ||
== That's it! == | == That's it! == | ||
Revision as of 13:02, 26 November 2007
Once you've created A Simple First Map, it's time to try something new with the skills you have learned.
Contents
Introduction
For this tutorial you must know:
- How to create, move, resize and delete brushes.
- How to texture brushes.
- How to create entities and lights.
- How to save, compile and run a map.
If you don't know how to do any of those things, you are advised to re-read the A Simple First Map tutorial. Unlike the first tutorial, the hollow tool is not going to be used at all - instead, every brush is going to be created individually.
This tutorial covers:
- How to create a map consisting of two rooms
- The basics of leaks
- How to create a moving door
- How to texture brush faces
- How to add a map object
- How to add ambience
Building Rooms
This map is going to consist of two rooms and a small doorway between them.
Planning
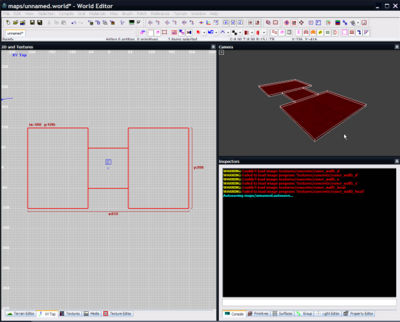
The best way to start is to create floor brushes that match the shape of the map we're going for. In this case, we need three brushes - one for the floor of each room, and a smaller one for a corridor that will join the two rooms together.
To make both rooms the same size, you can create one brush, select it, then use space to duplicate it, and move the duplicated brush into the appropriate place.
This is also an appropriate time to assign a texture. In this example, I have used 'concrete/concrete_floor01'.
Walls
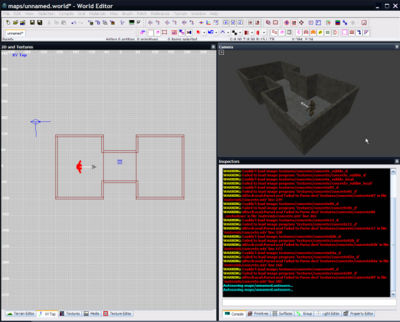
With the floor placed, create twelve more brushes to form the walls. Place them around the floor brushes, making sure there aren't any gaps between the bottom of the wall brushes and the wall brushes. Any gap can cause a leak. Use the different 2D top/front/side views (ctrltab) to place these brushes correctly.
This is also an appropriate time to add a player start entity. In this case, we've added an info_team_gdf_spawn entity which we can use to make sure the walls are tall enough.
Remember this map is not ready to compile yet! The lack of a ceiling means that this map is not yet sealed, and will leak.
Ceiling
Finally, the ceiling can be added. The simplest way to do this is to select the three floor brushes, use space to duplicate them, and then move them into place above the walls.
Remember to ensure that there are no gaps between any brushes. Use the 3D camera to go inside and make sure all the brushes are lined up correctly. If you notice any gaps to the outside, move and stretch the appropriate brushes to close them.
This is a good time to add a light or two to the map.
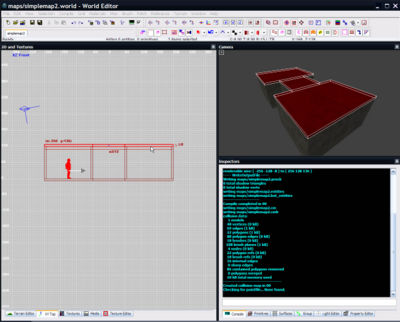
Now save the map and try to compile it. If all goes well, the console (O) will show plenty of blue output as seen in the screenshot.
Leaks
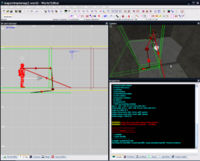
Depending on how careful you were in building your room, you may or may not have a leak in your map. If you do have a leak, the compiler will show a bright red message saying 'leaked', and the 3D view will draw a line going through the leak.
In the screenshot here, the the red line (with the arrows) goes through a small gap in the floor.
To fix this leak, we just need to resize one of the floor brushes so the hole is sealed.
When you compile the map again, and you've fixed the leak, it should now compile correctly. However, if you have more than one leak, the compile will fail again, but with a new set red line indicating the source of the next leak that needs to be fixed.
Creating a Door
There are many different ways to create a door. In this example, we're going to create a very basic door that involves making a brush that moves up and down when approached by a player.
Note: There are two types of entities. Firstly 'point entities', like lights and player spawn points, which cannot be resized. Secondly 'brush entities', which are simply brushes that are given some sort of ability.
Creating a door brush entity
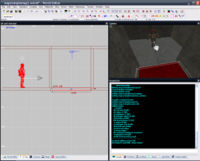
This door is created exactly like any other brush. Make sure it fits exactly into the corridor between the two rooms.
The brush is assigned the texture 'metal/metal_door_2' texture.
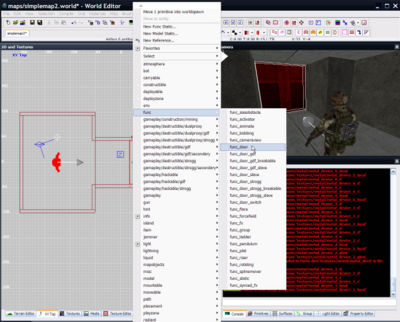
With the door brush selected, rmb on it to bring up the entity list, and select 'func_door'. This will turn the door brush into a 'func_door' entity, which means that in-game, it will slide open and closed when players approach.
Configuring the door entity
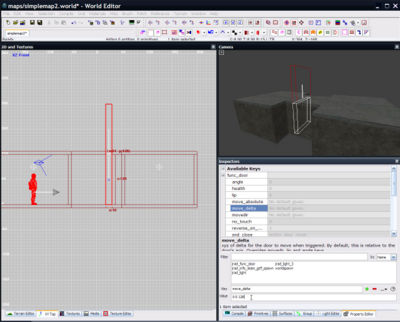
With the door selected, press N to show the Property Editor that allows the properties of this brush entity to be altered. Then expand the 'Available Keys', 'func_door' section at the top of the window. This reveals the properties of the door that can be edited that affect its behaviour.
The value that needs to be changed is move_delta. This defines how far and in which direction the door moves when it is triggered, and is defined as a 3D vector. For example, the 3D vector '16 32 128' means '16 units forward, 32 units right, and 128 units up'. Since we want this door to move upwards, we want to use a value of '0 0 128', which will make it move upwards 128 units when triggered.
To set this value, click on move_delta and at the bottom of the window where it says 'Value: No default given.', enter 0 0 128 and confirm with ENTER. If you scroll down to the bottom of entity properties window, you should now see move_delta0 0 128.
The 3D view should also show the position to which the door will move when opened.
If you want, you can compile the map now and test out the door you have created. Remember to spawn as a GDF though (as the map only contains an info_team_gdf_spawn entity). If all is well, the door will open upwards as you approach it, and close by itself.
Texturing the door
The door currently isn't textured very well; it doesn't match up with the corners of the brush and so it doesn't look like a door at all.
This can be fixed by choosing more appropriate textures, using the face-selection tool to apply a different texture to each side of the brush, and using the Surfaces Inspector or Texture Editor tools to align the textures correctly.
The Surfaces Inspector
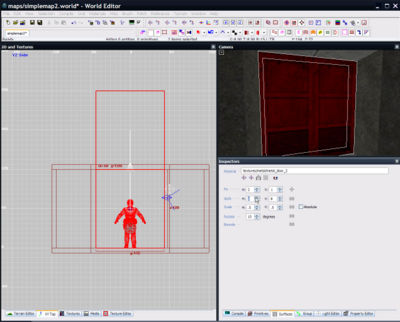
First, select the front face of the door (by using ctrlshiftlmb in the 3D view) so it is highlighted red. Then select the face on the other side as well, so we can edit both faces at the same time.
Press S to bring up the Surfaces Inspector. This window allows you to shift the texture along the face, scale it up and down, rotate it, or even just make the tools fit the texture to the surface for you.
The Surfaces Inspector works in a peculiar way. For example if you press the 'up/down' buttons next to each 'Shift' control (which by default, are set to the value '8'), the selected faces will have their textures shifted by 8 pixels. If you type in the value '32' instead of '8', and then use the 'up/down' buttons, the texture will be shifted by 32 pixels instead. Try this out to make sure you understand the concept.
The 'Scale' control works in a similar manner - by default, they're set to '0.5', so when you press the 'up/down' buttons, the texture will either be scaled down by 0.5 (to half their size), or scaled up by 0.5 (to double their size).
In this example, we want the texture to tile twice across the brush face. We could use the scale and shift buttons to do this manually, but instead, we can use the 'Fit' buttons to set the door texture exactly to the size of the brush. This is as easy as pressing the 'up/down' controls for the 'Fit' buttons until we get the alignment we want. Once that is done, the 'Shift' controls can be used to shift the texture along and into place.
The Texture Editor
While the front and back of the door are now textured, the underneath isn't, which means when the door opens and the player looks up, they'll see another ugly, unaligned texture.
To fix this, we could use the Surfaces Inspector as before. Or we could use the 'Texture Editor', which provides another way to alter texture alignment.
The first problem is selecting the face underneath the door, since there's a floor brush that is in the way. You could delete the floor brush, texture the door, then put the floor brush back, but there's an easier way - select the floor brush that's in the way, and press H to hide it. This will remove it from view, allowing us to texture the door without it getting in the way.
You can unhide hidden objects by pressing shiftH.
Now deselect all objects with ESC (just to be sure) select the bottom face of the door, and assign it the texture 'metal_trim/hazzard_strip', which is more appropriate than the texture it was using before. Unfortunately, although it's a more appropriate texture, it's still not aligned correctly to the door.
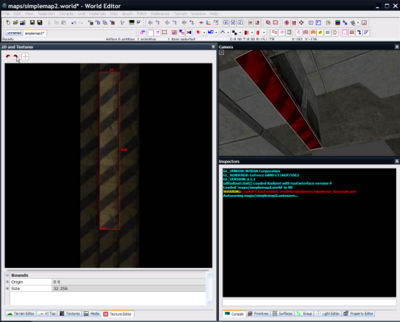
To fix this, open the 'Texture Editor' window with shiftF2. This tool is fairly intuitive - drag the red box around and you should see in the 3D view how it corresponds to the texture alignment. In this case, our texture is rotated the wrong way, so we also need to press one of the rotate arrows at the top of the window to fix this. The texture is now aligned perfectly.
Adding Map Objects
Map objects are 3D models (usually made by a 3D artist) that you can add to your map to make the world appear more detailed. Map objects range from trees, to destroyed vehicles, barrels, light fittings, electrical boxes, tables, pylons, street lamps, aerials and all sorts of objects that you wouldn't want to create from brushes.
To see all the map objects that are available in the SDK, try opening the map /maps/sdk/model_gallery.world, which contains every single model you can use.
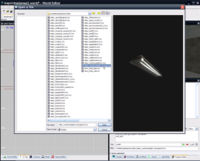
rmb on a 2D view to bring up the entity menu, but instead of selecting an entity, instead choose 'New Model Static...'. This will bring up a file chooser allowing you to browse all the available models. For this example, we're going to add a light fitting, which is found in /models/mapobjects/valley/valley_warehouselight_nosupports.lwo. Note that the preview window in the file chooser can be manipulated using the mouse buttons.
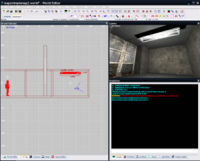
The object will now appear in your map. Since it's a light fitting, move it into an appropriate place for a light fitting, such as near the ceiling, and create (or move) a light entity underneath it.
Adding an Ambience
Empty maps are, by default, pitch-black. However, this produces interiors that are not convincing. To counter this, maps should have either atmosphere entities (if they're outside) or light_ambient entities (if they're inside), which help light up an area with a constant colour.
To add an ambience to this map, simply create a light_ambient entity and place it anywhere inside the map. On the Property Inspector (N) press the shortcut button (next to the red '-' button, pictured) in the Property Inspector, select 'Ambient Cubemap', followed by an ambience you wish to use. If you use the real-time renderer (F3) the 3D view will also show you the ambience you have chosen.
You can also preview ambience and atmosphere effects from the toolbar - use the dropdown menu from the blue and white 'clouds' icon. Note this will only affect the editor's real-time preview - once you've found an ambience or atmosphere you like, use the same setting in your light_ambient or atmosphere entity.
That's it!
You've now created a slightly more complex map with a team-specific spawn, a working door, better textures, and a map object. Well done!
Remember to use the How do I...? page for a quick reference to shortcuts and mouse buttons.
Here are some things to try:
- Add a second corridor and a third room to make the map into an 'L' shape.
- Give the rooms a higher ceiling than the corridor.
- Make the door open sideways instead of upwards.
- Make the door open only half way.
- Add a second door.
See Also
- How do I...? - how to do common tasks
- A Simple First Map - the first tutorial
- An Advanced Map - a more complex guide to creating a map, including terrain
- Design: Troubleshooting - troubleshooting guide
