Difference between revisions of "A Simple Second Map"
(→Planning) |
|||
| Line 23: | Line 23: | ||
[[Image:simplemap2_floor.jpg|thumb|400px|Creating floor brushes]] | [[Image:simplemap2_floor.jpg|thumb|400px|Creating floor brushes]] | ||
The best way to start is to create floor brushes that match the shape of the map we're going for. In this case, we need three brushes - one for the floor of each room, and a smaller one for a corridor that will join the two rooms together. | The best way to start is to create floor brushes that match the shape of the map we're going for. In this case, we need three brushes - one for the floor of each room, and a smaller one for a corridor that will join the two rooms together. | ||
| + | |||
| + | To make both rooms the same size, you can create one brush, select it, then use {{accelkey|space}} to duplicate it, and move the duplicated brush into the appropriate place. | ||
This is also an appropriate time to assign a texture. In this example, I have used 'concrete/concrete_floor01'. | This is also an appropriate time to assign a texture. In this example, I have used 'concrete/concrete_floor01'. | ||
Revision as of 10:56, 23 November 2007
Once you've created A Simple First Map, it's time to try something new with the skills you have learned.
For this tutorial you must know:
- How to create, move, resize and delete brushes.
- How to texture brushes.
- How to create entities and lights.
- How to save, compile and run a map.
If you don't know how to do any of those things, you are advised to re-read the A Simple First Map tutorial. Unlike the first tutorial, the hollow tool is not going to be used at all - instead, every brush is going to be created individually.
This tutorial covers:
- How to create a map consisting of two rooms
- How to create a moving door
- How to add a map object
- How to add Strogg and GDF spawns
Building Rooms
This map is going to consist of two rooms and a small doorway between them.
Planning
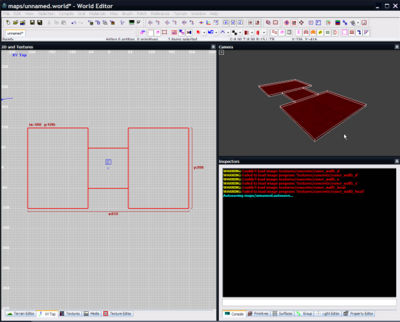
The best way to start is to create floor brushes that match the shape of the map we're going for. In this case, we need three brushes - one for the floor of each room, and a smaller one for a corridor that will join the two rooms together.
To make both rooms the same size, you can create one brush, select it, then use space to duplicate it, and move the duplicated brush into the appropriate place.
This is also an appropriate time to assign a texture. In this example, I have used 'concrete/concrete_floor01'.
Walls
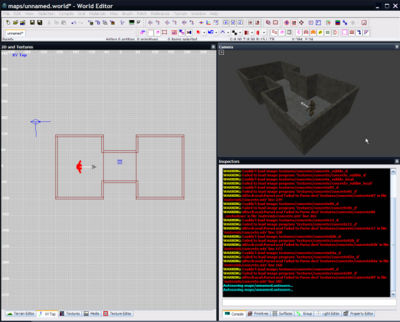
With the floor placed, create twelve more brushes to form the walls. Place them around the floor brushes, making sure there aren't any gaps between the bottom of the wall brushes and the wall brushes. Any gap can cause a leak. Use the different 2D top/front/side views (ctrltab) to place these brushes correctly.
This is also an appropriate time to add a player start entity. In this case, we've added an info_team_gdf_spawn entity which we can use to make sure the walls are tall enough.
Remember this map is not ready to compile yet! The lack of a ceiling means that this map is not yet sealed, and will leak.

