Detail Groups
Detail brushes are designed to reduce map polycount and memory usage, in order to improve performance. Normal brushes can be turned into detail brushes by adding them to a Detail Group.
Contents
Usage
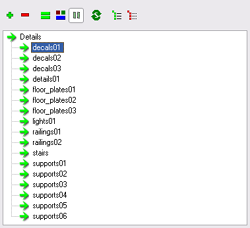
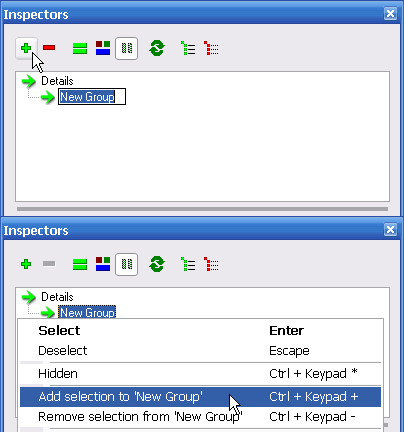
Detail brushes are created in three stages: creating an empty detail group, selecting brushes to put into the group, and the actual assignment of the selected brushes to the newly-created detail group.
TODO
Purpose
Detail brushes are treated specially during the compile phase. Usually, when two brushes touch, their faces are split in order to produce clean geometry and faces that are never seen are thrown away. However, this process can sometimes produce more polygons than are strictly necessary, resulting in slower performance. A map with an excess amount of faces will not only render slower, but will compile slower and also be slower in-game as the engine has to test for physics collisions between more faces.
Detail brushes receive light, cast shadows, and collide with entities in the same fashion as normal, non-detail brushes.
Explanation
Simple Example
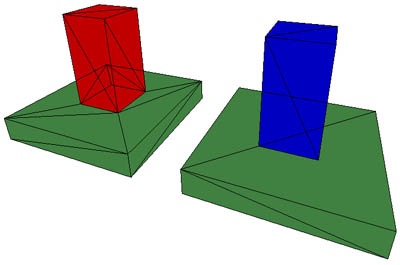
This screenshot demonstrates the effect that detail groups can have on face splitting.
This scene consists of four world brushes: two green brushes, one red brush and one blue brush. Only the blue brush has been assigned to a detail group.
Note how the blue brush does not cause splitting in the green brush face below it, thereby using fewer polygons to display the exact same scene.
This example shows immediately how many polygons can be saved by assigning some brushes to detail groups.
Stairs Example
Stairs such as these are a prime example of detail group usage. Notice how when the steps aren't marked as detail, the wall is split for every single step, resulting in over 30 polygons. However, if the steps are marked as detail, the wall is only split into four polygons. The right-most image illustrates the base geometry more clearly, with the detail brushes coloured green (half the steps have been removed for illustration purposes.)
Map Examples
Substation Compound
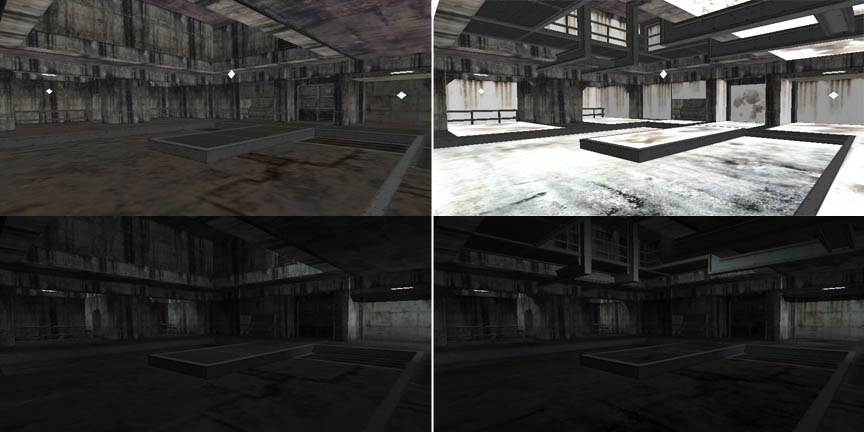
This screenshot is the interior of the compound building next to Sewer's first objective. Details here include the stair brushes, railings, and concrete girders (near the top.) All have been made detail brushes in order to avoid splitting world geometry.
In addition, LOD Grouping is utilised in this room in order to gracefully render less and less when viewed at greater distances.
Island Bunker
This screenshot is the interior of the bunker, at Island's first objective. The large number of decals here (the white textures) have all been assigned to a detail group (aptly named 'decals'). Other details such as supports and walkways have also been assigned to detail groups in order to reduce the number of faces split by the compiler. This results in a drastically better-performing room, due to fewer faces to both render and test for collisions against.
Notes
- While detail brushes won't cut up world geometry, they can be cut by world geometry and other detail brushes.
Developer Commands
- r_showTris 0/1 - turns on/off the rendering of face outlines, so it is easy to identify where faces are being split and where savings can be made by making brushes detail (as used in above screenshots)


